
How to Set Up Vita3K on Android Handhelds in 2026
I bought my PS Vita not long after launch and somehow, the little bugger is still alive. Still hacked. Still patched. Still running custom firmware. Still doing its best with that tiny quad-core ARM Cortex-A9 and PowerVR GPU combo that looked impressive in 2012 and adorable about three hardware generations later.
Mine is a PS Vita 1000, the proper one. OLED screen, 3G module, the heavier shell, the premium feel, the version built like Sony expected someone to drop it down a flight of stairs and keep playing Persona 4 Golden afterward. And to be fair, it held up ridiculously well for a 15 year old handheld. Here is a picture of it.

The problem is, not everyone managed to grab one back when they were cheap, and in the retro handheld world, the Vita has become one of those systems people keep circling back to. Not because its library is enormous, but because it has a weirdly specific set of games that still matter. Muramasa Rebirth, Freedom Wars, Soul Sacrifice Delta, Dragon’s Crown, Odin Sphere Leifthrasir, Uncharted: Golden Abyss, Killzone Mercenary (just to name a few). Some of these are still stuck on Vita. Some technically escaped, but the Vita versions still have their own appeal.
Now let’s get the important part out of the way:
The best Vita3K experience is still on x86.
That means Steam Deck OLED, ROG Ally X, Lenovo Legion Go, MSI Claw and other handheld PCs. Not because Android is bad, but because the desktop branch of Vita3K is generally easier to troubleshoot and less dependent on the driver roulette.If Vita3K is one of your main reasons for buying a handheld, x86 is still the safer choice. Full stop.
But since this blog leans heavily into Android handhelds, this guide is about getting Vita3K running properly on Android, with the kind of setup that makes sense on devices like the AYN Odin 2, Odin 2 Portal, Odin 2 Mini, Retroid Pocket 5, Retroid Pocket 4 Pro, ANBERNIC RG 477M, RG Cube and even older Snapdragon phones.
And yes, Vita3K on Android is absolutely usable in 2026. You just need to set it up correctly, use the right file formats and stop expecting every green compatibility badge to mean “perfect.”

What to use, what to avoid and which handhelds make sense
Before we get into the setup, here is the short version of what works best.
If you want the easiest Android Vita3K experience, Snapdragon handhelds are still the priority. That means the AYN Odin 2 family and Retroid Pocket 6 are the obvious recommendations, because Snapdragon 8 Gen 2 gives you the best mix of performance, Vulkan behavior and fewer “surprises”. The Retroid Pocket 5 is also still a very relevant Vita3K device. Snapdragon 865 may be older, but it is still strong enough for a lot of Vita games, especially 2D heavy or lighter 3D titles.
On the other hand, devices built around Mali GPUs can be more hit or miss. Something like the Retroid Pocket 4 Pro can still run selected Vita games, but you lose one of the biggest Android advantages: custom Adreno GPU drivers.
Also, a quick but important notes before we go further:
- Commercial Vita games in .vpk format are not the format you want
- NoNpDrm .zip dumps are the safest option on Android
- .pkg installs are also supported
- .vpk is mostly for homebrew or manually packaged content
- Vitamin/MaiDump-era garbage is best avoided
Vita3K’s own FAQ still lists File > Install .pkg and File > Install .zip/.vpk as the supported install methods, but the real world experience is much cleaner with NoNpDrm .zip or .pkg + license workflows. Community users keep running into trouble with commercial .vpk files on Android, even though the menu technically still shows the option.
1. Download the correct Vita3K Android build
Vita3K has an official website, vita3k.org, but if you try to grab the Android build there, it will usually bounce you over to GitHub anyway and the build you want is the latest Android nightly.
The GitHub “continuous” build is usually the most up-to-date Android APK and it is the version most people actually use when testing newer fixes. Install that directly on your phone or handheld.
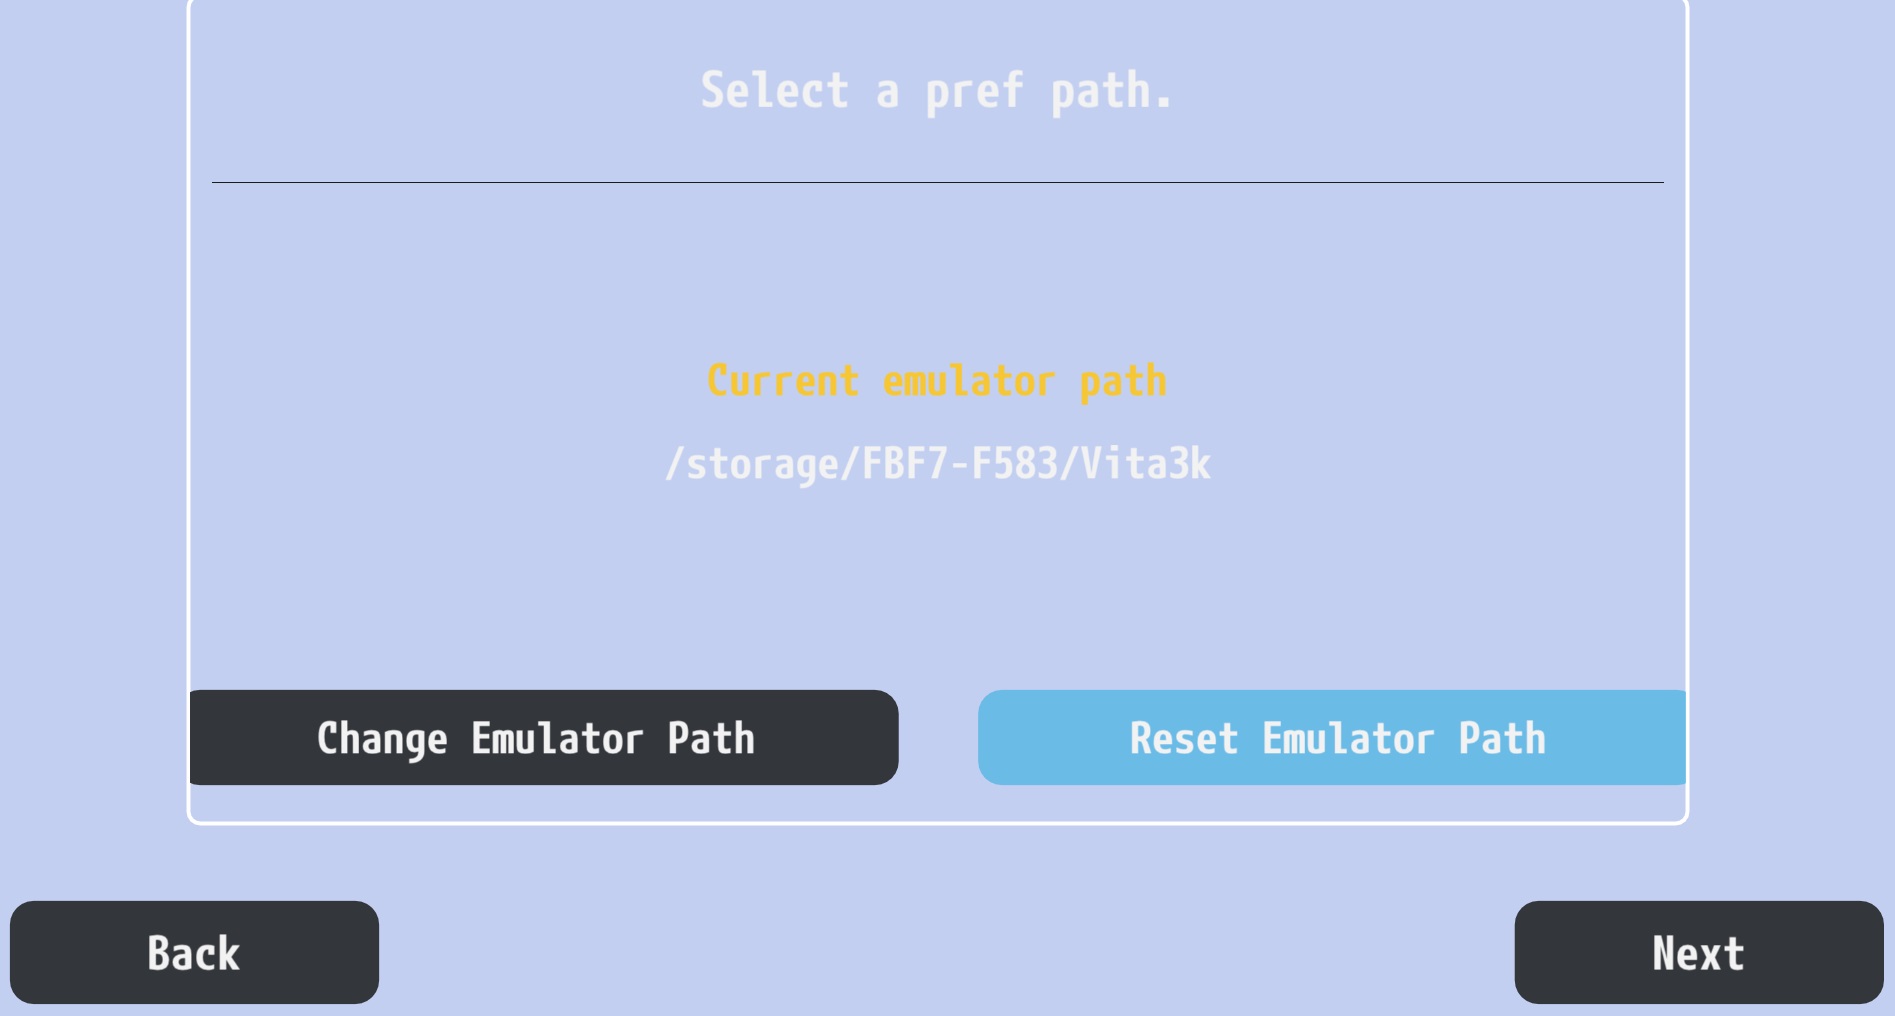
Once you launch Vita3K for the first time, Android will hit you with the usual scoped storage nonsense, but just roll with it. Create a folder called Vita on your internal storage and point Vita3K there as your working directory.
Yes, the emulator has its own default internal app path under:
Android/data/org.vita3k.emulator/files
Vita3K’s FAQ confirms that is the default Android home directory, but for sanity, especially when dealing with firmware files, game archives and custom drivers, using a clean folder like:
Internal Storage/Vita
is much easier to manage.
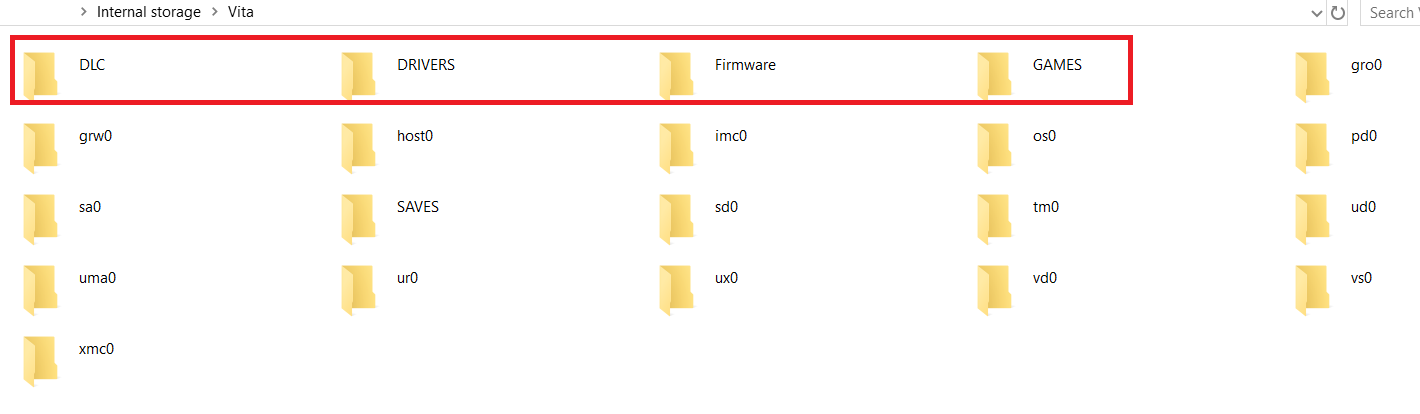
Inside that folder, I recommend creating these subfolders right away:
- Firmware
- Games, Roms or Zips
- Drivers
- Saves (optional, just for your own backups)
- DLC (optional if you like keeping things tidy)
You do not need all of them for the emulator to function, but trust me, future you will appreciate not digging through random Downloads folders later. It should look something like this:
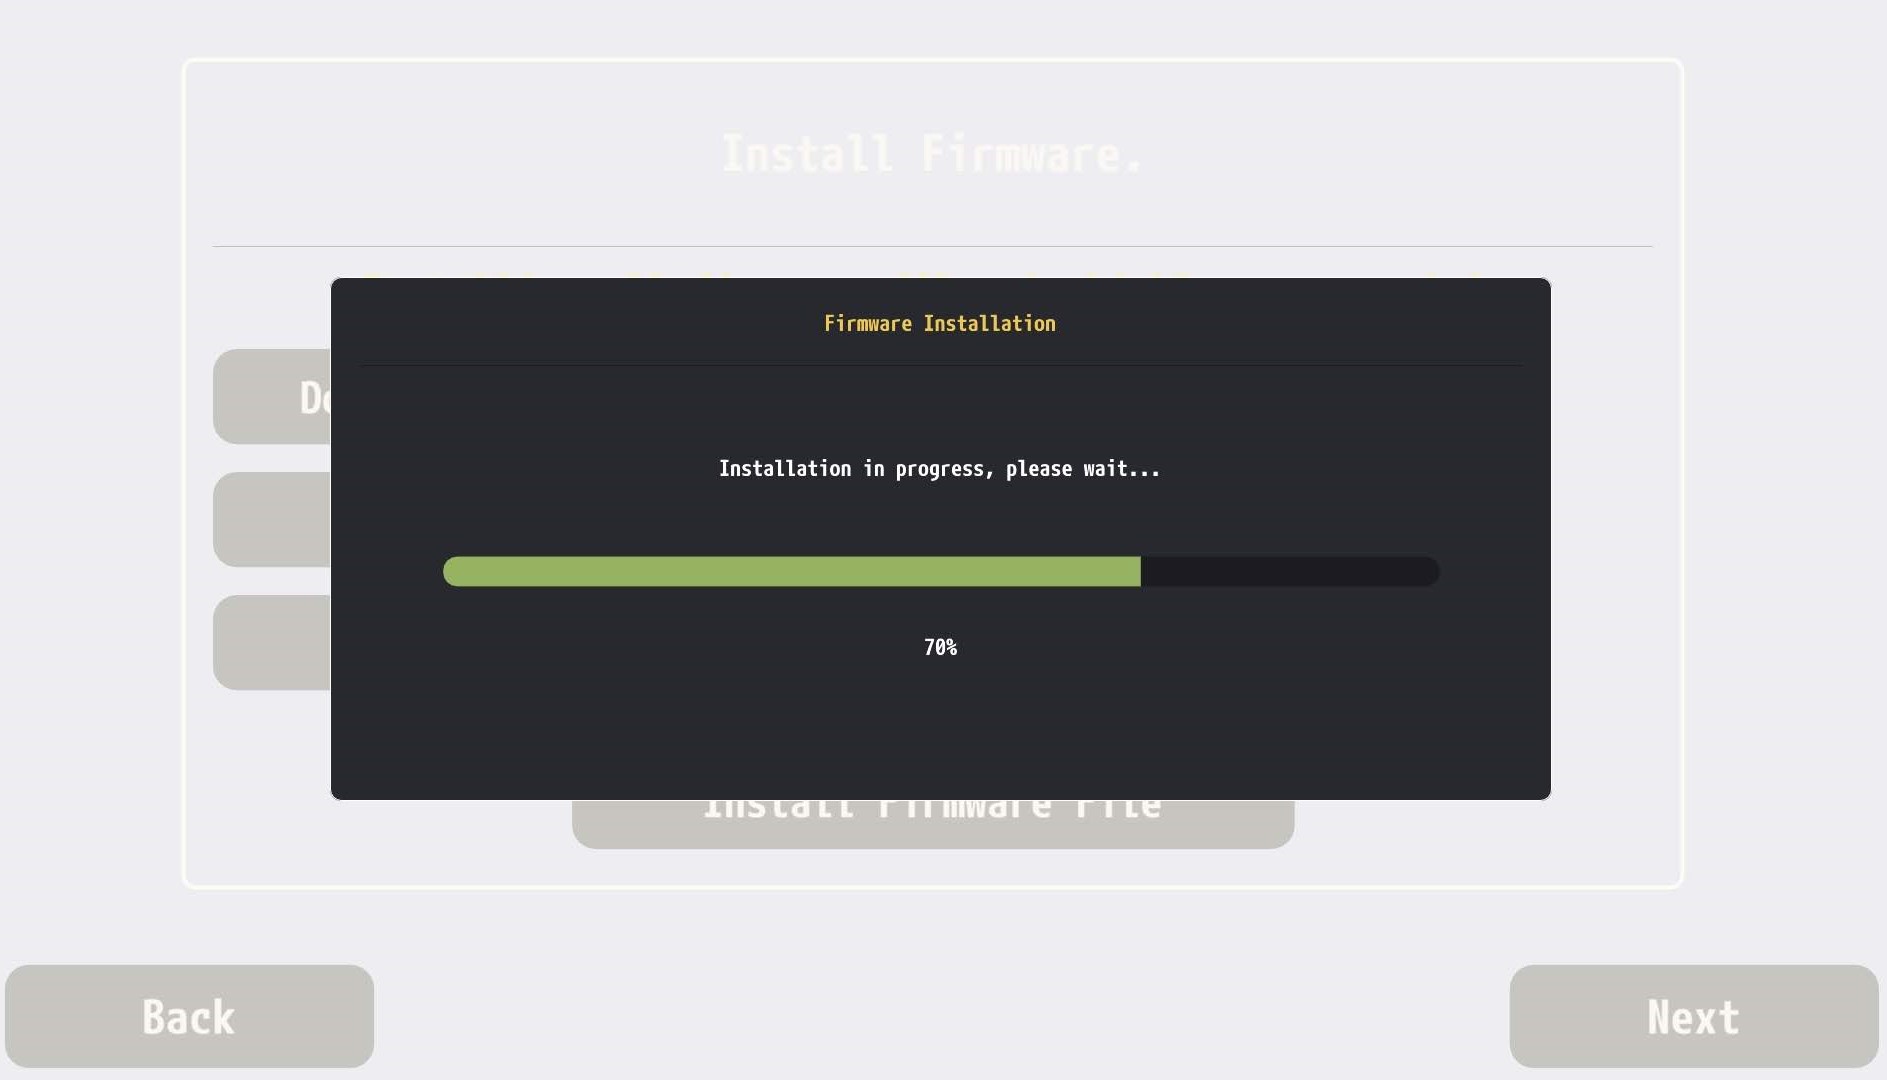
2. Install the three firmware files Vita3K actually needs
This is where most people get tripped up, and it is also where the official download links can still be a bit annoying on Android, that’s why I uploaded them here.
Vita3K’s Android setup expects the usual three part starter pack:
- Preinst Firmware (our mirror)
- Official Firmware (our mirror)
- Font Package
Put all three in your Vita/Firmware folder and install them one by one using the emulator’s firmware install option.


A few practical notes here:
- On some Android browsers, the Preinst Firmware and Font Package links may fail to start unless you switch the page to desktop mode or long-press the link and open it in a new tab. This is a known annoyance in community guides.
- Some users have reported black screens or failed installs on certain Android builds, especially on older devices or quirky OEM firmware. If Vita3K hangs while installing firmware, that is usually an app-side issue or a bad build, not you doing something wrong. There are multiple reports of this behavior on Odin 2 and other devices.
Once all three entries show as installed, you are good.
And yes, the Font Package matters. A lot of people skip it because the firmware seems to install fine, then wonder why system text or certain games behave strangely. Install all three and move on.
3. Create your Vita user
This part is easy.
Vita3K will ask you to create a virtual Vita user. Pick whatever username you want. This is basically your local profile for the emulator.

It does not need to match your old PSN name. It does not need to be dramatic. Unless you want it to be dramatic.
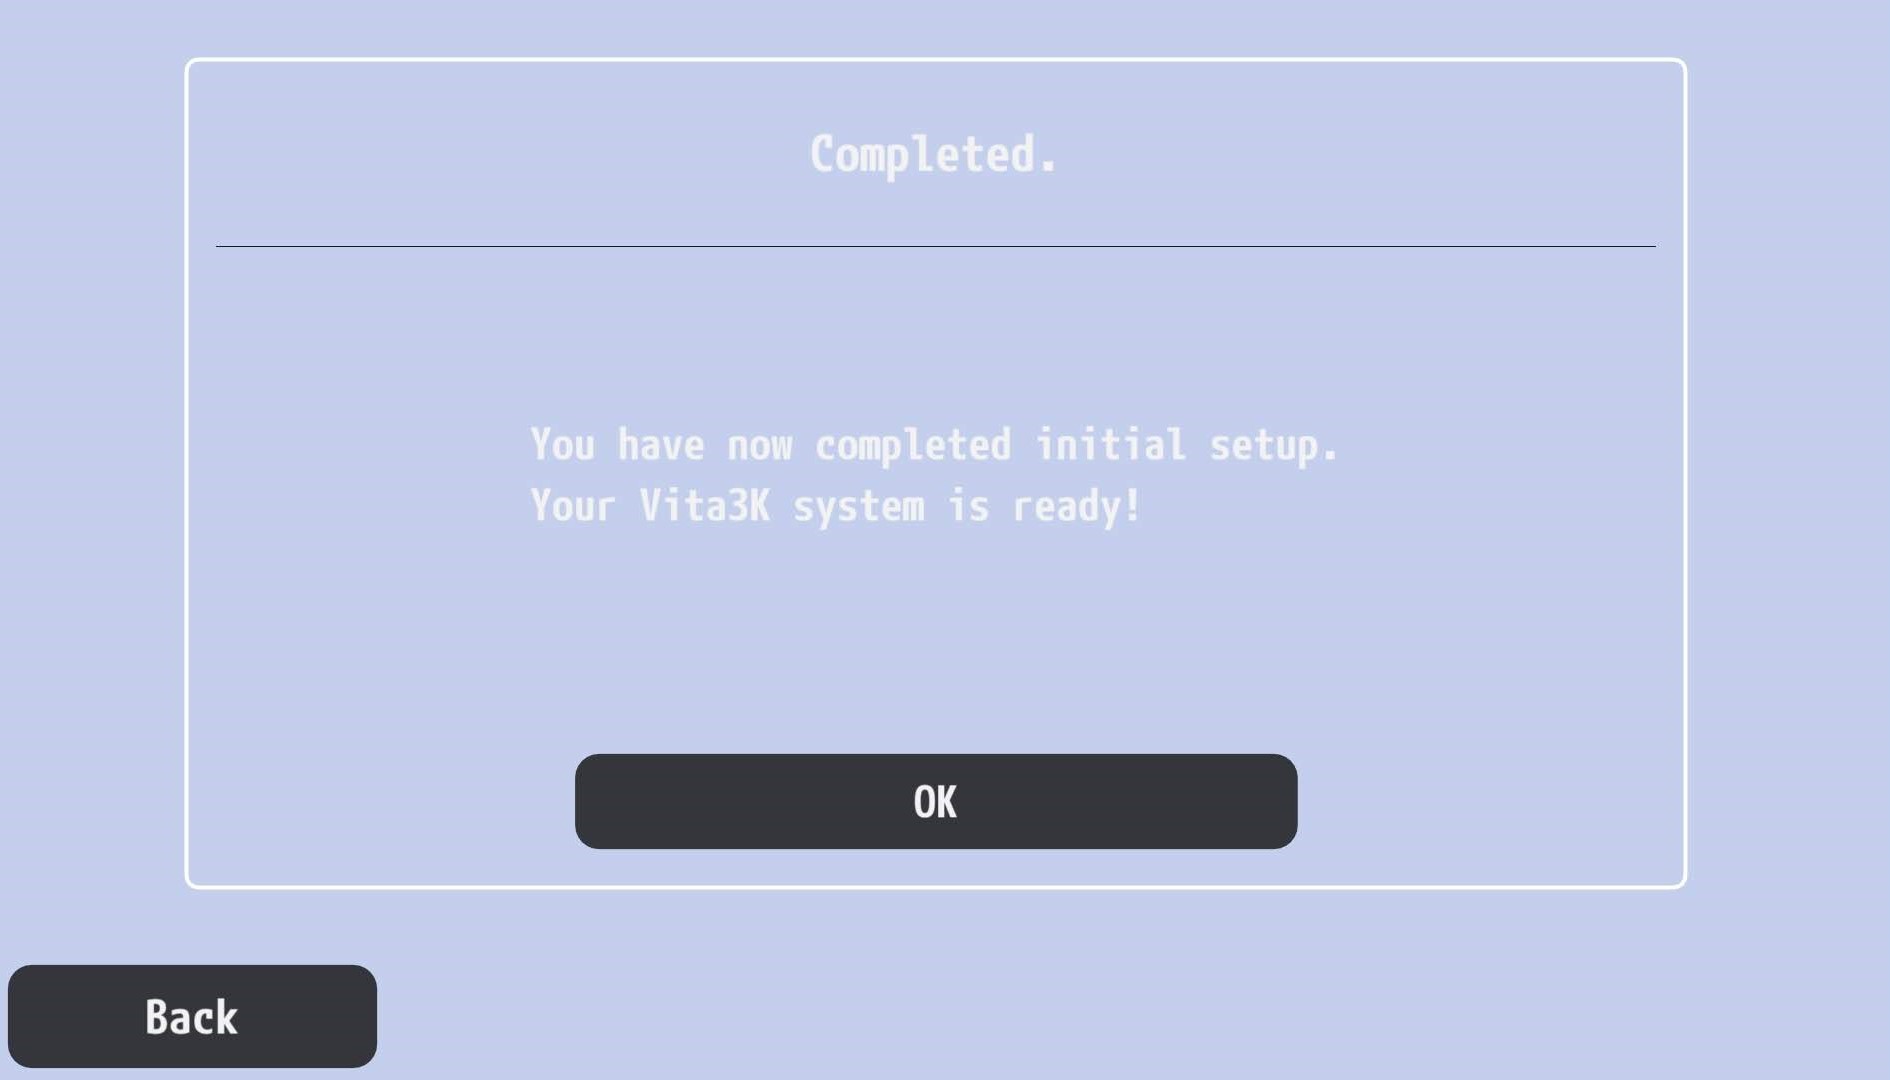
After that, you are done with the installation, time to set thing up.
4. Add custom GPU drivers if you are on Snapdragon
This is the part a lot of “beginner guides” skip, and it is one of the biggest reasons some people think Vita3K is broken when it is actually just using a mediocre stock Vulkan driver.
If your device uses a Qualcomm Snapdragon chip with an Adreno GPU, you should strongly consider testing custom Turnip/Mesa Vulkan drivers.
This mostly applies to devices like:
- AYN Odin 2 / Odin 2 Portal / Odin 2 Mini
- Retroid Pocket 5/G2/6
- Snapdragon phones running chips like 865, 870, 8 Gen 1, 8+ Gen 1, 8 Gen 2, 8 Gen 3
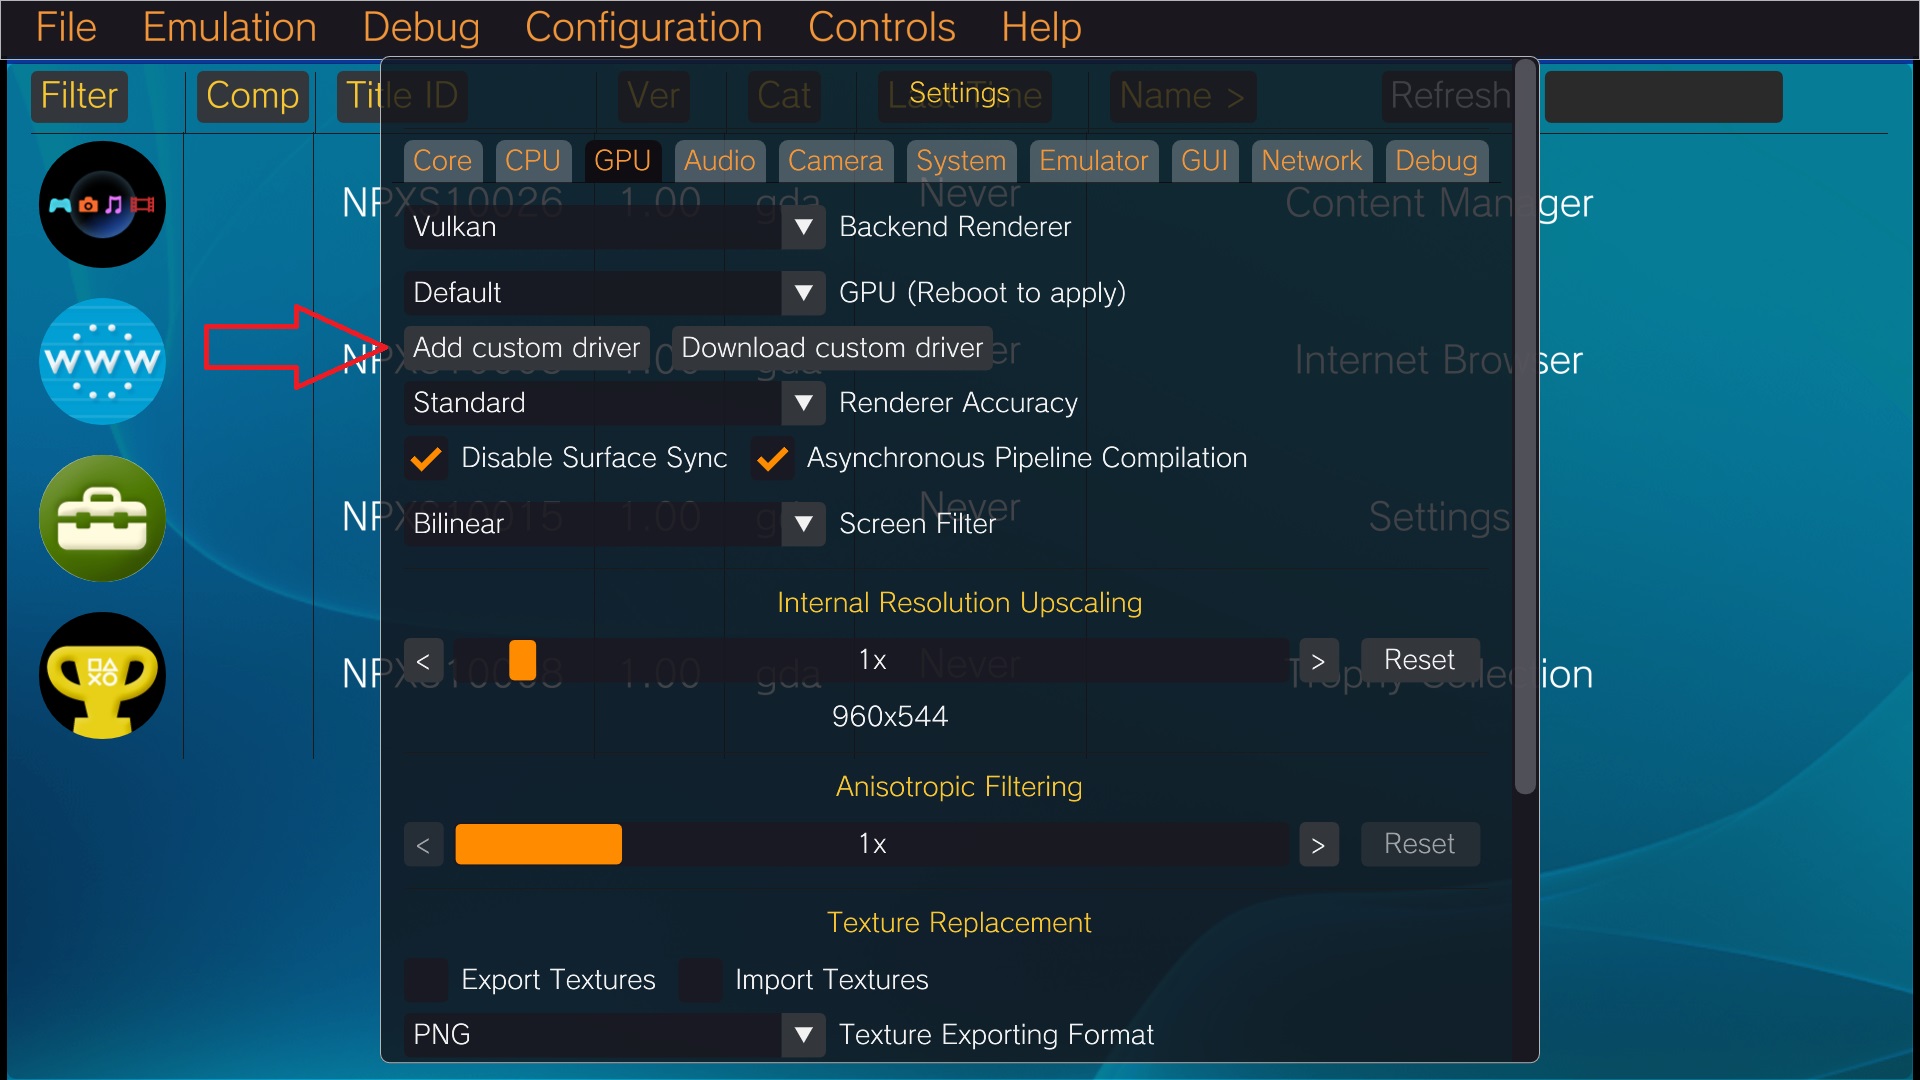
In Vita3K, go to:
Configuration > Settings > GPU > Add custom driver
Load the driver .zip, select it, then restart the emulator. Just don’t forget to scroll down and tap SAVE.
This is one of the few Android emulator tweaks that can genuinely matter. Some games render better, some become more stable and some stop doing cursed things with transparency or missing textures. Even third-party setup guides specifically call out Snapdragon + custom driver setups for Vita3K.
A quick reality check though:
- There is no universal best driver
- A driver that helps Muramasa Rebirth may do nothing for Freedom Wars
- A driver that fixes one game can break another
- If a game works perfectly on stock Vulkan, leave it alone
If your handheld uses Mali, PowerVR or anything non-Adreno, skip this step. You do not get the same custom driver luxury there.
5. Prepare your games the correct way
This is the step where most new Vita3K users accidentally sabotage themselves. Do not treat Vita3K like PPSSPP. You are not just dragging in an ISO and calling it a day.
For Android in 2026, the cleanest and most reliable game formats are:
- NoNpDrm .zip
- .pkg + license file
- Homebrew .vpk only when appropriate
If you have a commercial Vita game packed as .7z, that is not directly useful. Extract it first.
If you have a NoNpDrm dump, the structure matters. You want the TITLE_ID folder contents zipped properly, not just random outer folders stuffed into an archive like a crime scene.
The official Vita3K quickstart is very clear about the NoNpDrm method:
- dump the game
- place the fake license as work.bin inside TITLE_ID/sce_sys/package/
- then zip the contents of the TITLE_ID folder
- install that archive through Install .vpk/.zip
That “zip the correct folder” detail is huge. If a game fails to install, this is probably your problem, or trying to install .7z instead of proper .zip
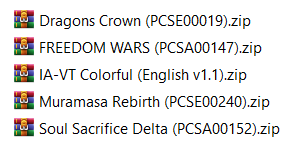
Here is an example, how a game ZIP should be named.
If you are doing this on Android itself, use something like ZArchiver or another proper archive tool and make sure you are zipping the actual game folder contents cleanly. Community reports also suggest that re-zipping directly on internal storage works better than trying to do it from microSD in some cases.
Also, very important:
Avoid Vitamin and old Maidump-era releases.
Vita3K explicitly warns that older dump formats are flawed and can cause corruption or broken behavior. NoNpDrm remains the sane choice.
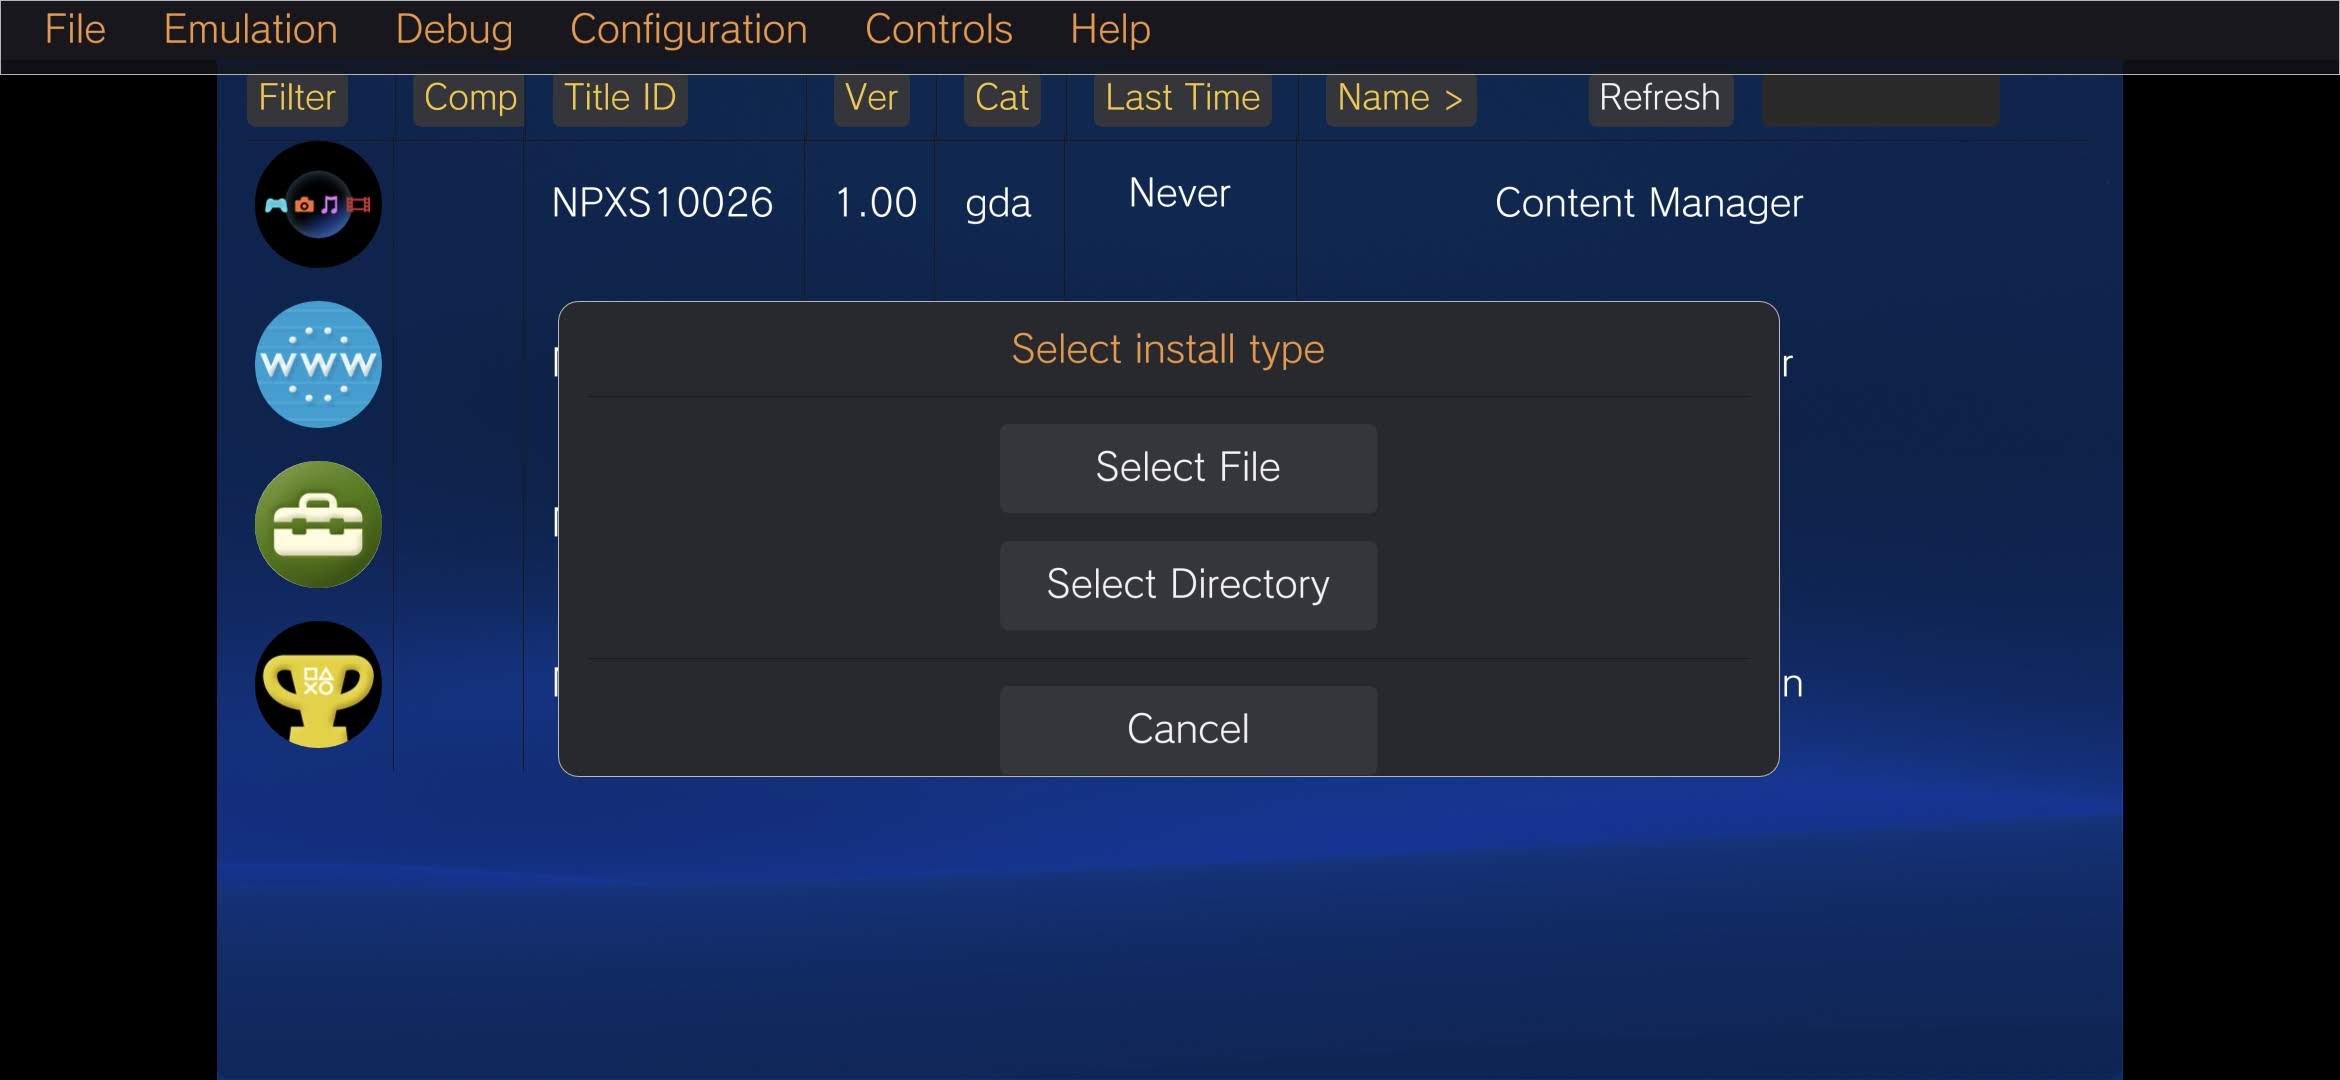
6. Install the games
Once your files are prepared correctly, the install process is simple.
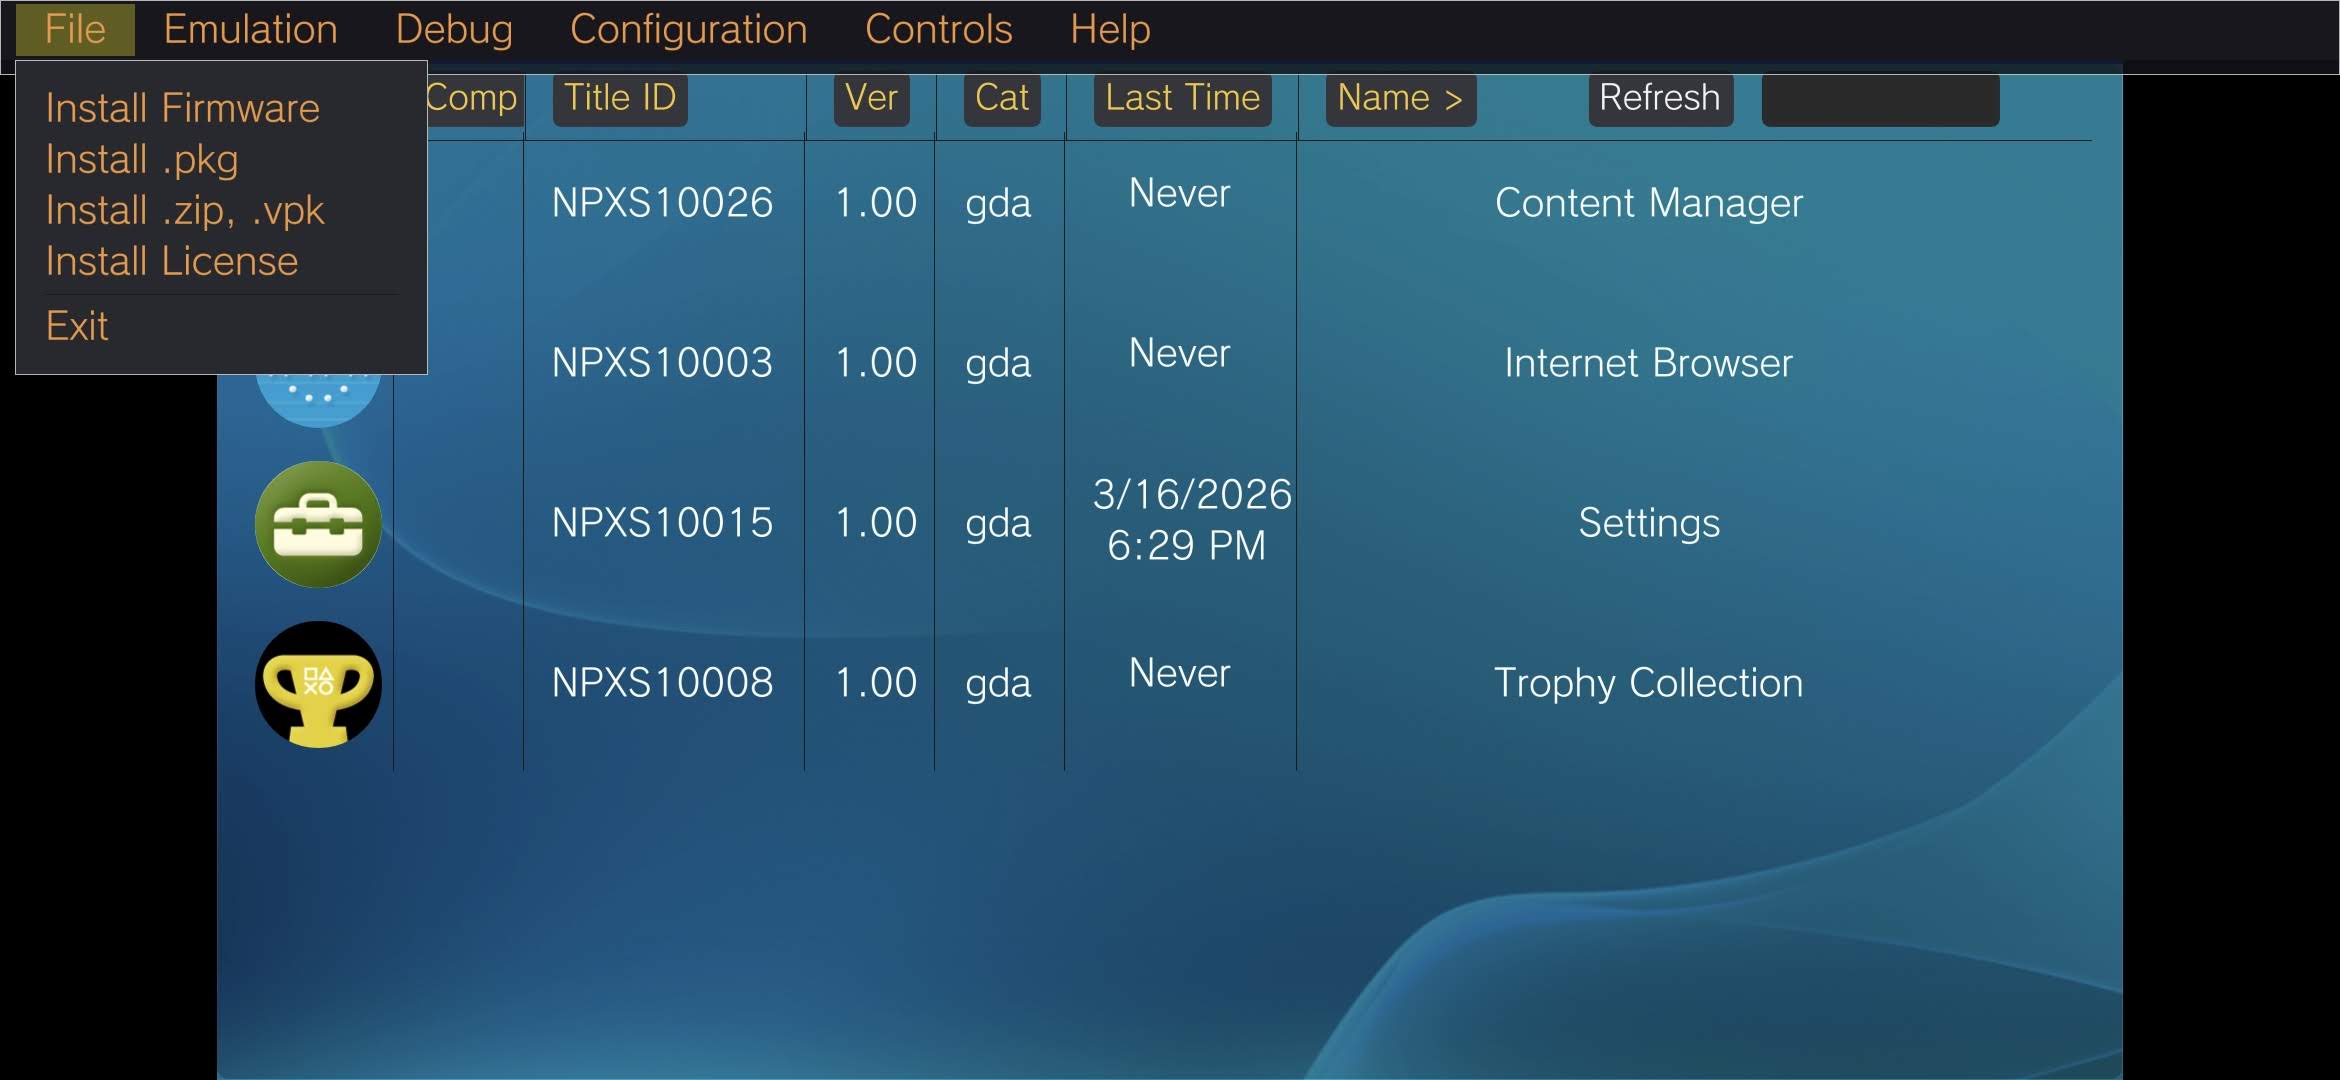
In Vita3K, go to:
File > Install .pkg
or
File > Install .zip/.vpk
For most Android users, .zip is the path you will use the most.
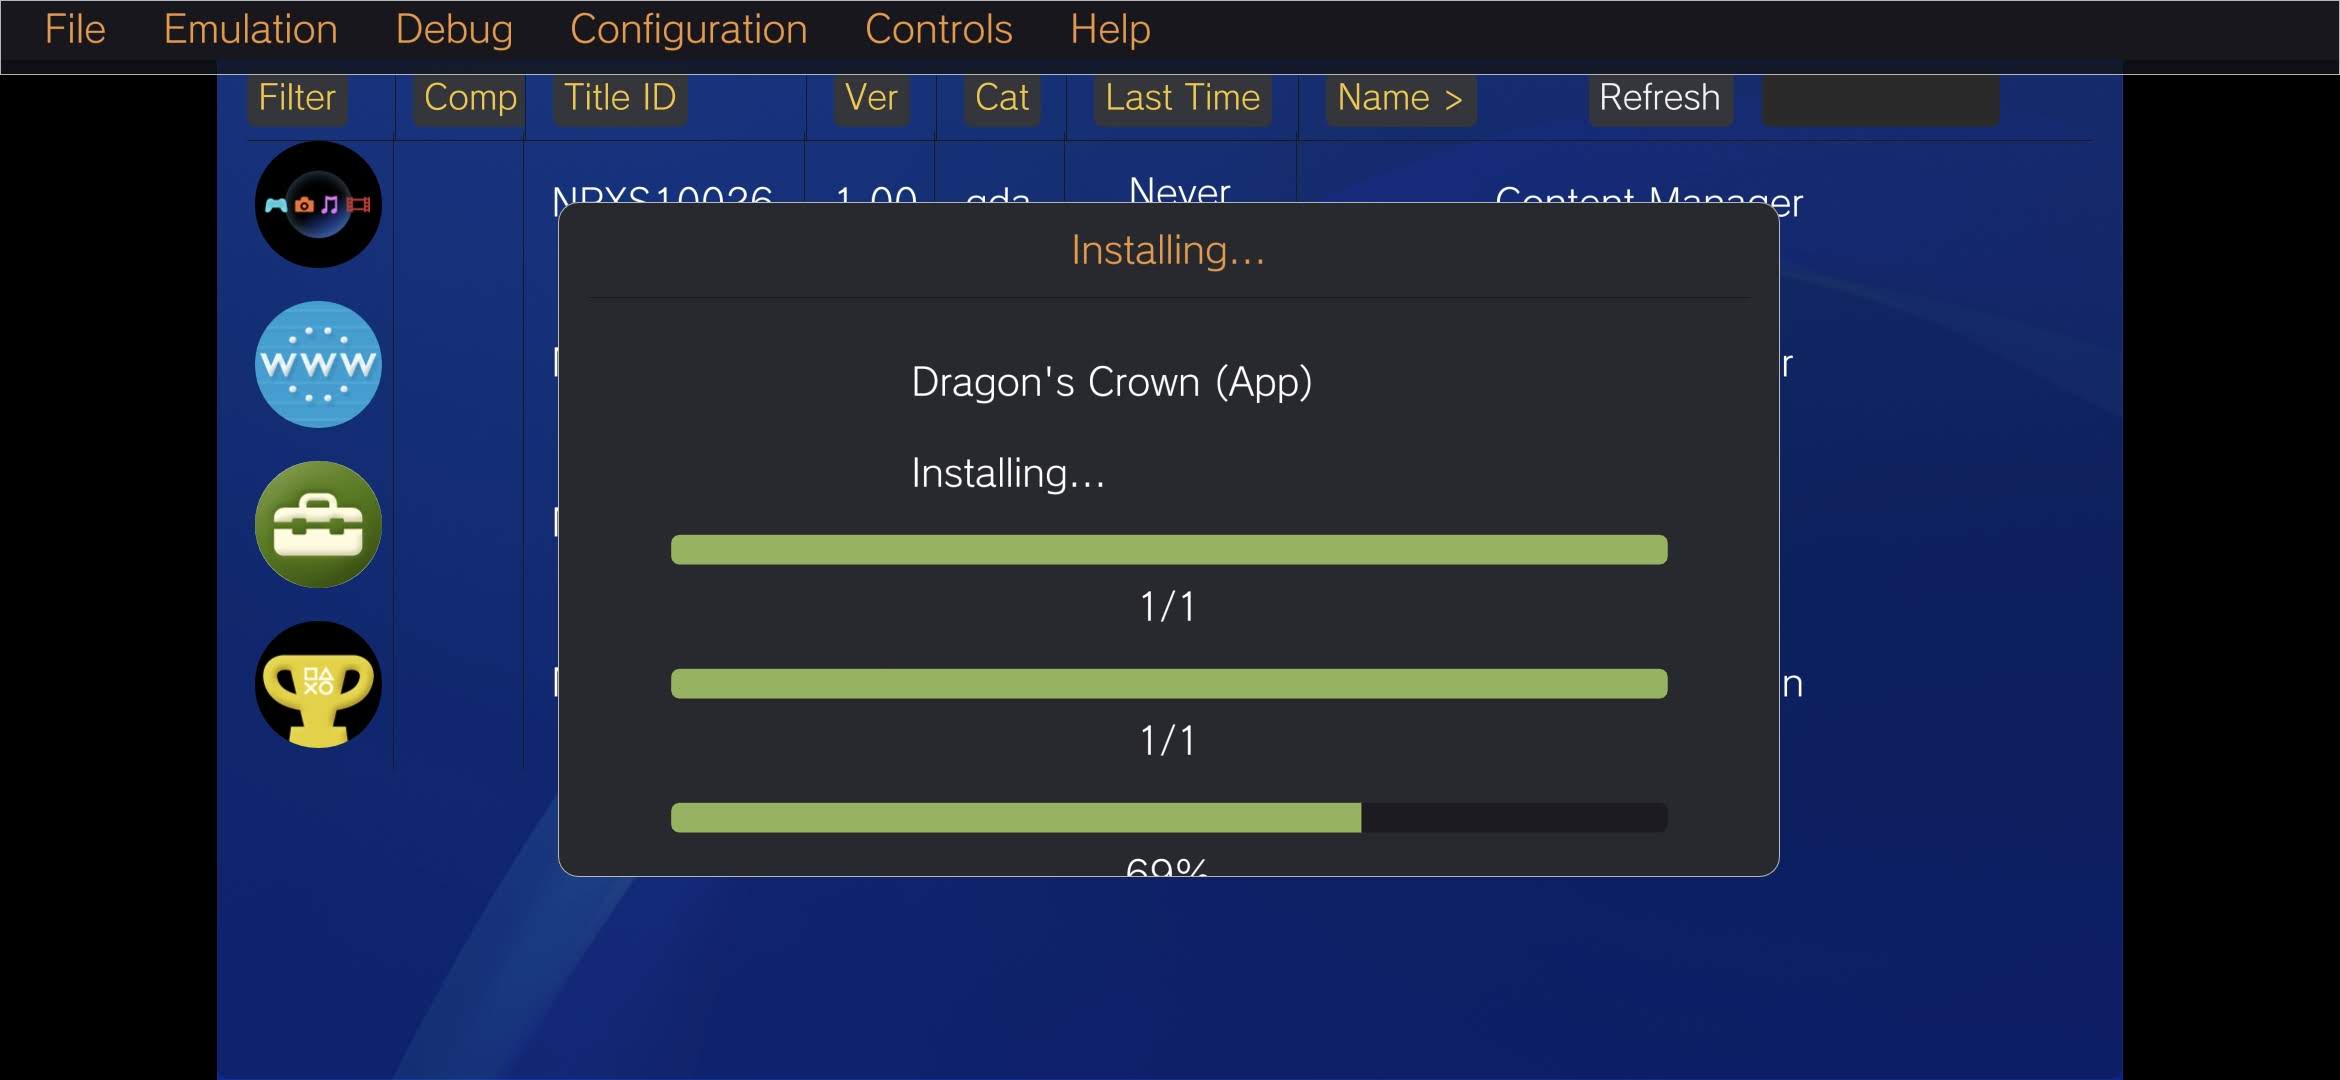
A few notes:
- Large NoNpDrm installs can take a while on Android
- Some handhelds take significantly longer than PC for big games
- If the emulator appears frozen for a moment during a larger install, give it a minute before you assume it died
- If a game fails to install, your archive structure is often the real problem, not the emulator
If you are installing DLC, the process is similar, but Vita3K’s official quickstart notes that DLC should be installed one at a time and that the license file placement still matters.
7. Create per-game configs
This is the biggest QOL tip in the whole guide. Do not use one global config for every Vita game. Vita3K is still too inconsistent for that.
Some games love 2x or 3x internal resolution. Some hate it. Some behave beautifully on stock Vulkan. Some suddenly become less weird with a custom Turnip build. Some are stable until you enable a setting that sounded clever on Reddit.
To create per-game settings:
- Long-press the installed game
- Choose Custom Config
- Select Create
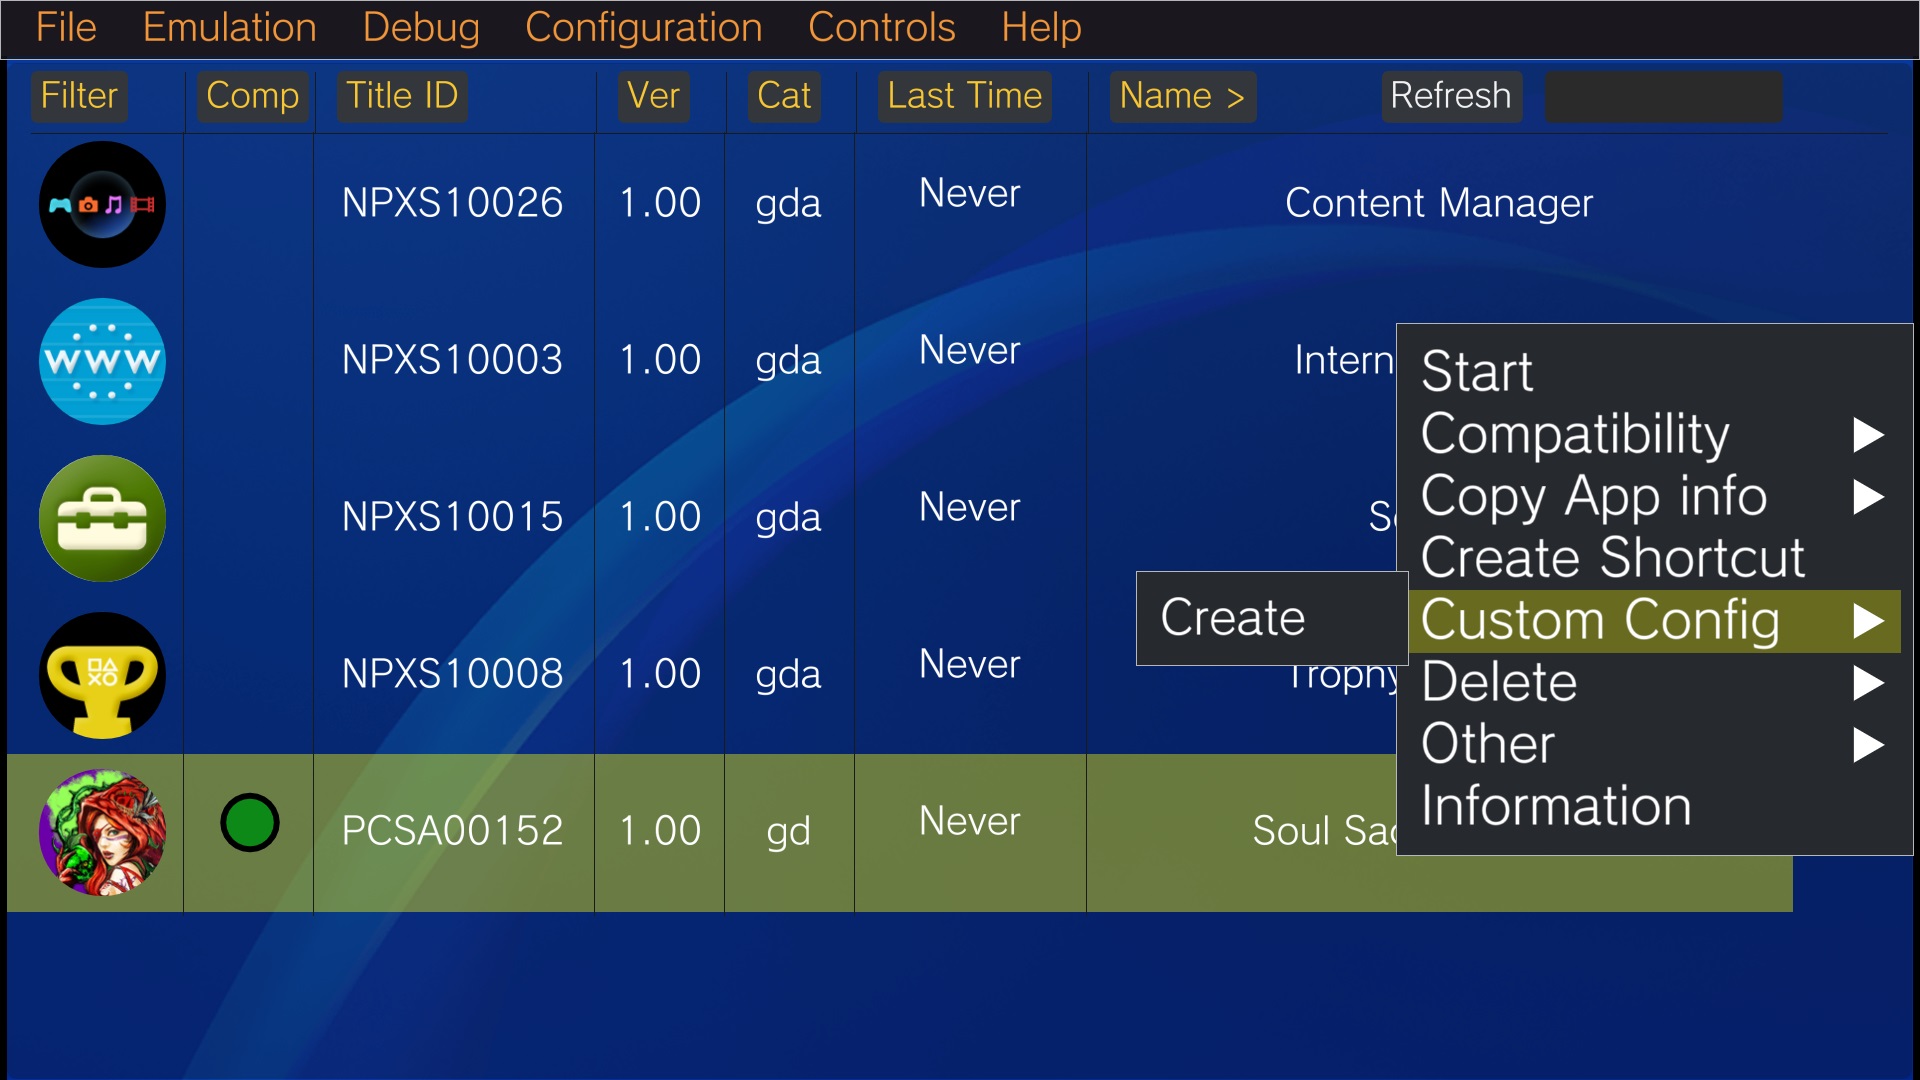
From there, you can set things like:
- Internal resolution
- Renderer backend
- Custom GPU driver
- Touch overlay behavior
- Other game-specific tweaks depending on the build
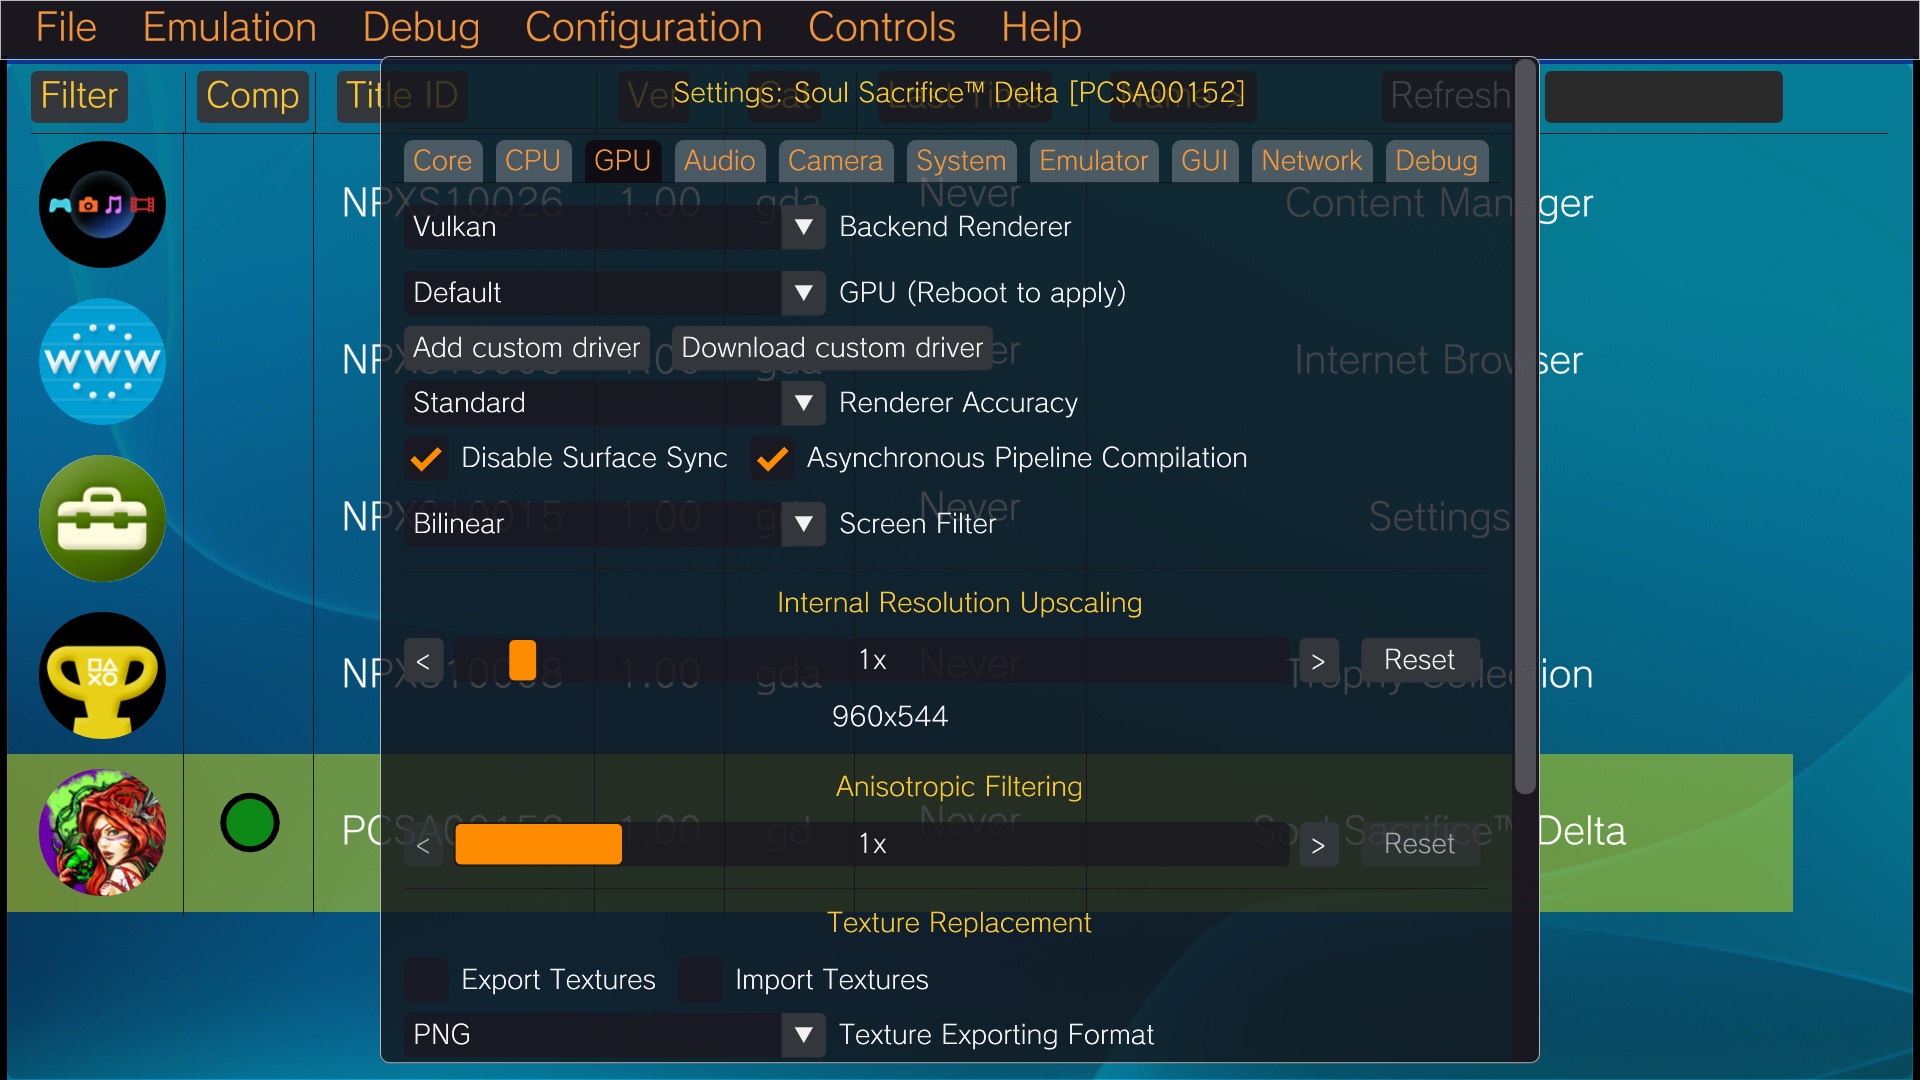
A few sane starting points:
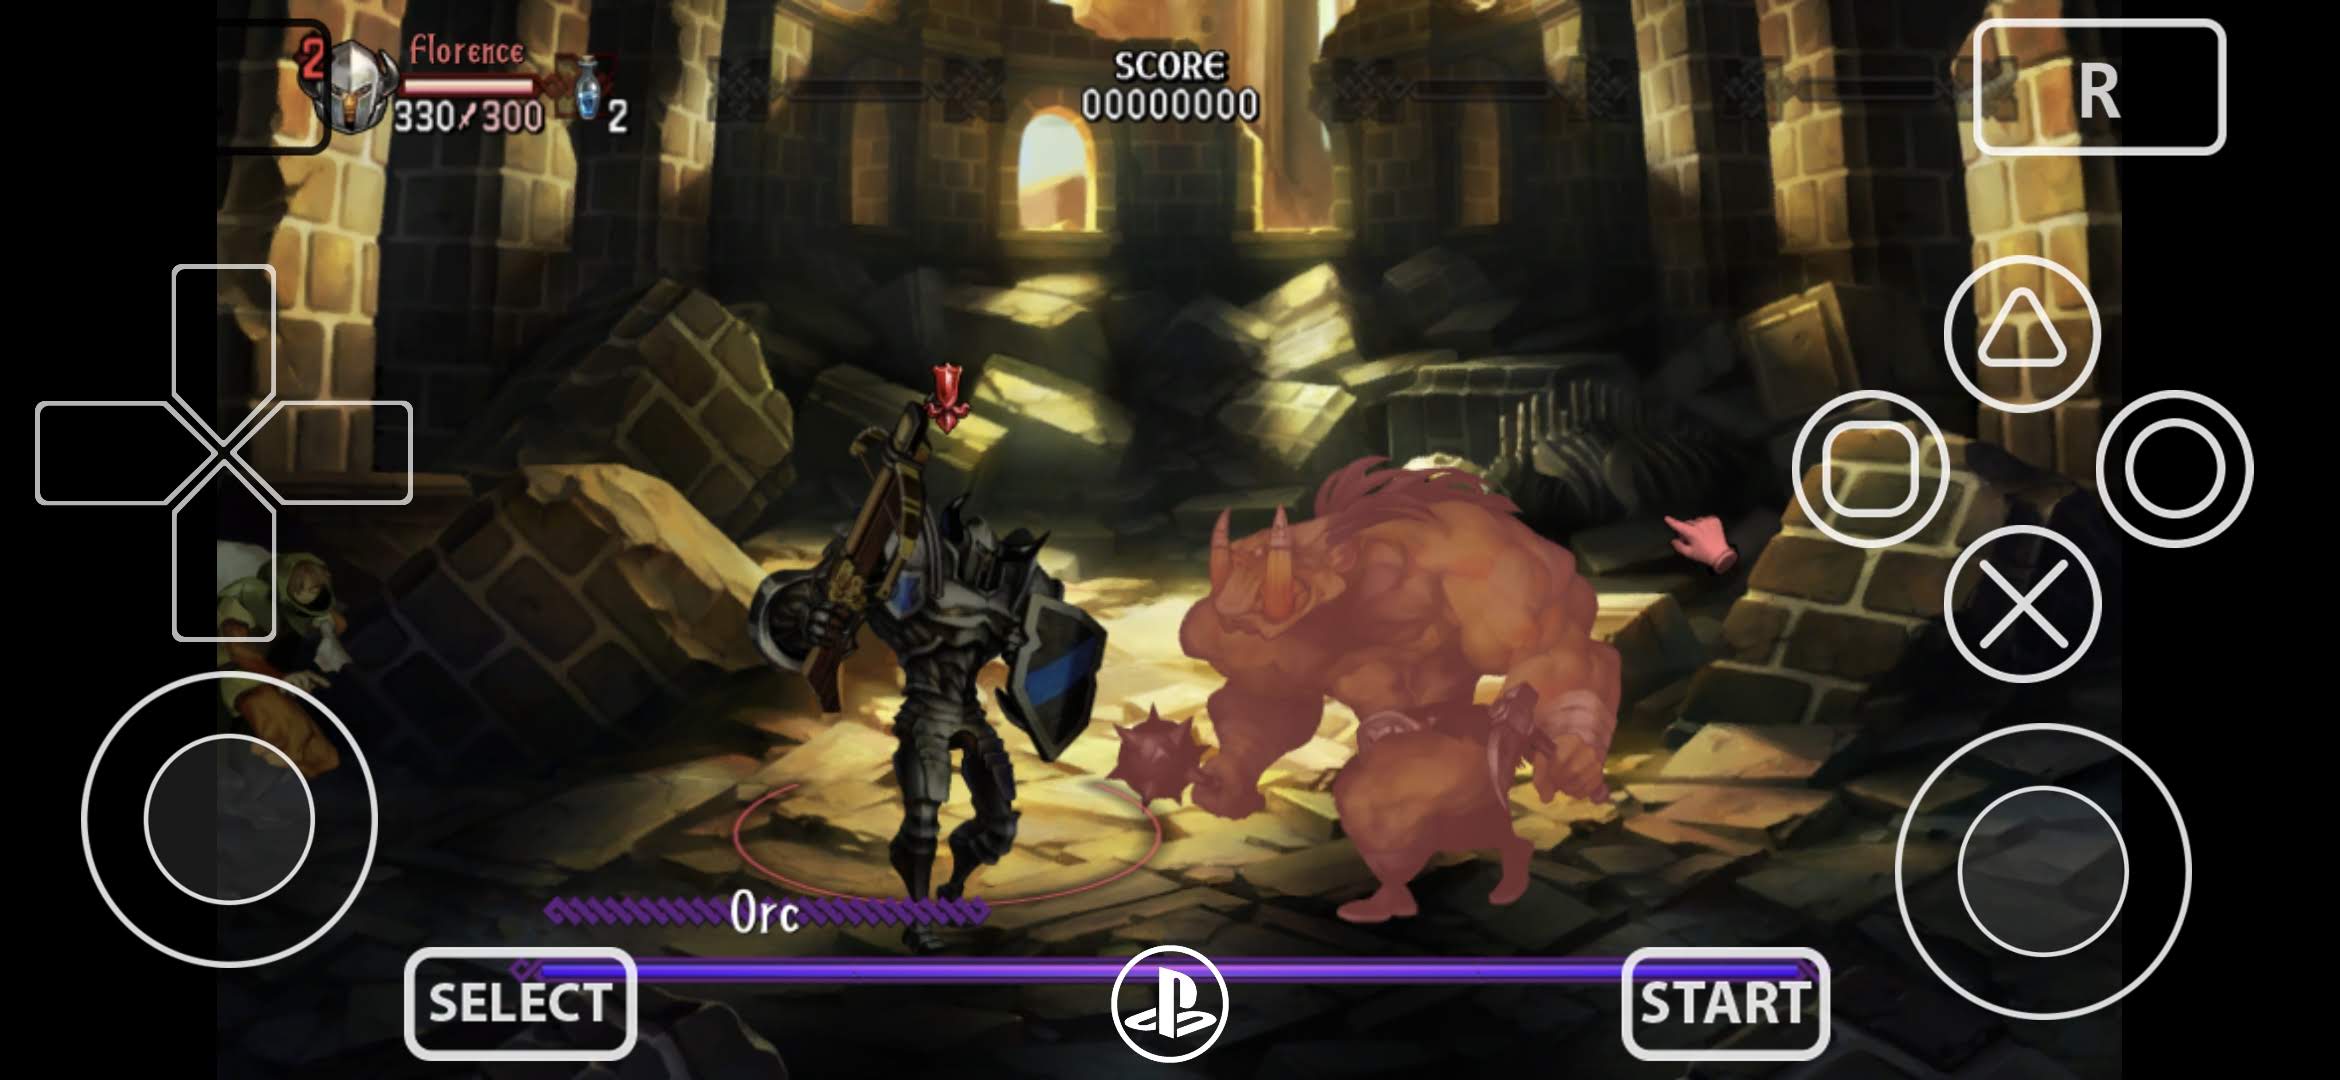
- 2D-heavy or Vanillaware games like Muramasa Rebirth, Dragon’s Crown or Odin Sphere Leifthrasir: start at 2x
- Heavier 3D games like Freedom Wars, Soul Sacrifice Delta, Killzone Mercenary: start at 1x
- If it is stable, move up slowly
- If it breaks, stop pretending 3x is the norm
8. The settings that matter
If you want the short version, here it is.
Use Vulkan first.
That is the default advice for a reason. It is generally the better path on Android, especially on Snapdragon devices. Even game-specific notes like the commonly shared IA/VT Colorful English patch explicitly recommend Vulkan because OpenGL can produce broken graphics.
Treat 2x as the realistic sweet spot on strong Android handhelds.
On Odin 2, Odin 2 Portal and Retroid Pocket 5/6, 2x is usually where the emulator still feels safe. 3x is possible in some games, especially prettier 2D-heavy titles, but don’t assume it globally.
Use 1x for heavy 3D games first.
If a game is already hard on the emulator, internal resolution is not where you win the battle.
Don’t assume every green compatibility badge means polished.
Vita3K’s compatibility list is useful, but it is not an Android guarantee.
Keep your expectations in check on mid-tier handhelds.
A Retroid Pocket 4 Pro or RG Cube can still run selected Vita titles, but the more demanding 3D games are exactly where Android Vita emulation starts to break.
Vita3K on Android in 2026 is no longer just a novelty. On the right hardware, it is absolutely worth setting up, HOWEVER:
- x86 handhelds are better
- Snapdragon is safer
- Vulkan is the default
- NoNpDrm .zip is the format to trust
- Per-game configs matter
- Vanillaware is still your best developer for emulating
And if Vita3K refuses to cooperate on your Android handheld after all of this, congratulations. You have officially recreated the authentic PS Vita enthusiast experience: amazing games, weird software behavior and just enough friction to make success feel personal.
Links
Vita3K official website
Github Android Nightlies
Preinst Firmware (our mirror)
Official Firmware (our mirror)
Font Package
Dejan B.
Discover more from AndroGaming.com
Subscribe to get the latest posts sent to your email.
Pingback: 5 Best PS Vita Games for Vita3K on Android - AndroGaming.com